This page describes specific information for macOS 10.11 (El Capitan) up to 10.13 (High Siera).
If you have more recent macOS version please refer to recent SIP instructions.
TotalFinder has support for macOS 10.11 (El Capitan) up to macOS 10.13 (High Sierra), but cannot be installed on a normally configured machine due to System Integrity Protection (SIP).
This article can help you how to configure your machine to allow installation by modifying the SIP setting temporarily.
If you decide to modify the settings, you will be able to install TotalFinder. Just to be clear…
Your machine may be less secure when System Integrity Protection is not running. It is entirely your decision to modify the settings.
How to install TotalFinder by turning off System Integrity Protection
We now recommend turning off SIP to install TotalFinder, and to turn it back on again after it has been installed.
TotalFinder will guide you through the process via notification dialogs. Please check the TotalFinder installation page for general installation steps. This document explains SIP-specific steps.
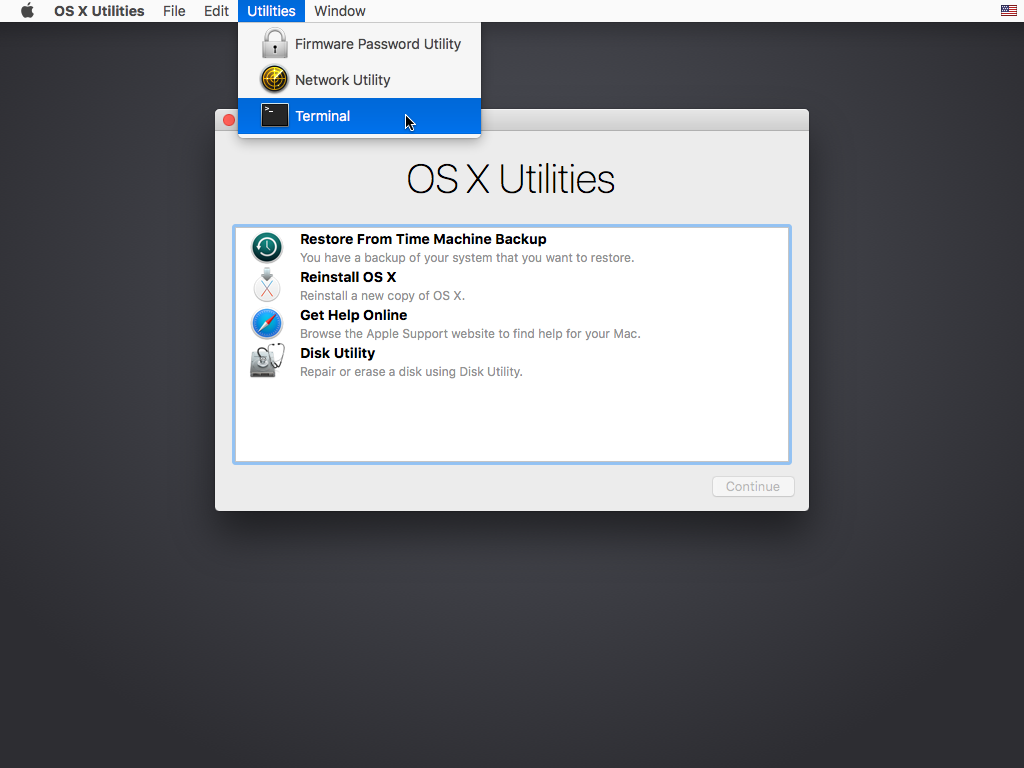
You must boot into the Recovery OS. You do this by restarting your machine, and holding Command+R until the Apple logo
appears. Then select Terminal from the Utilities menu. It looks like this:
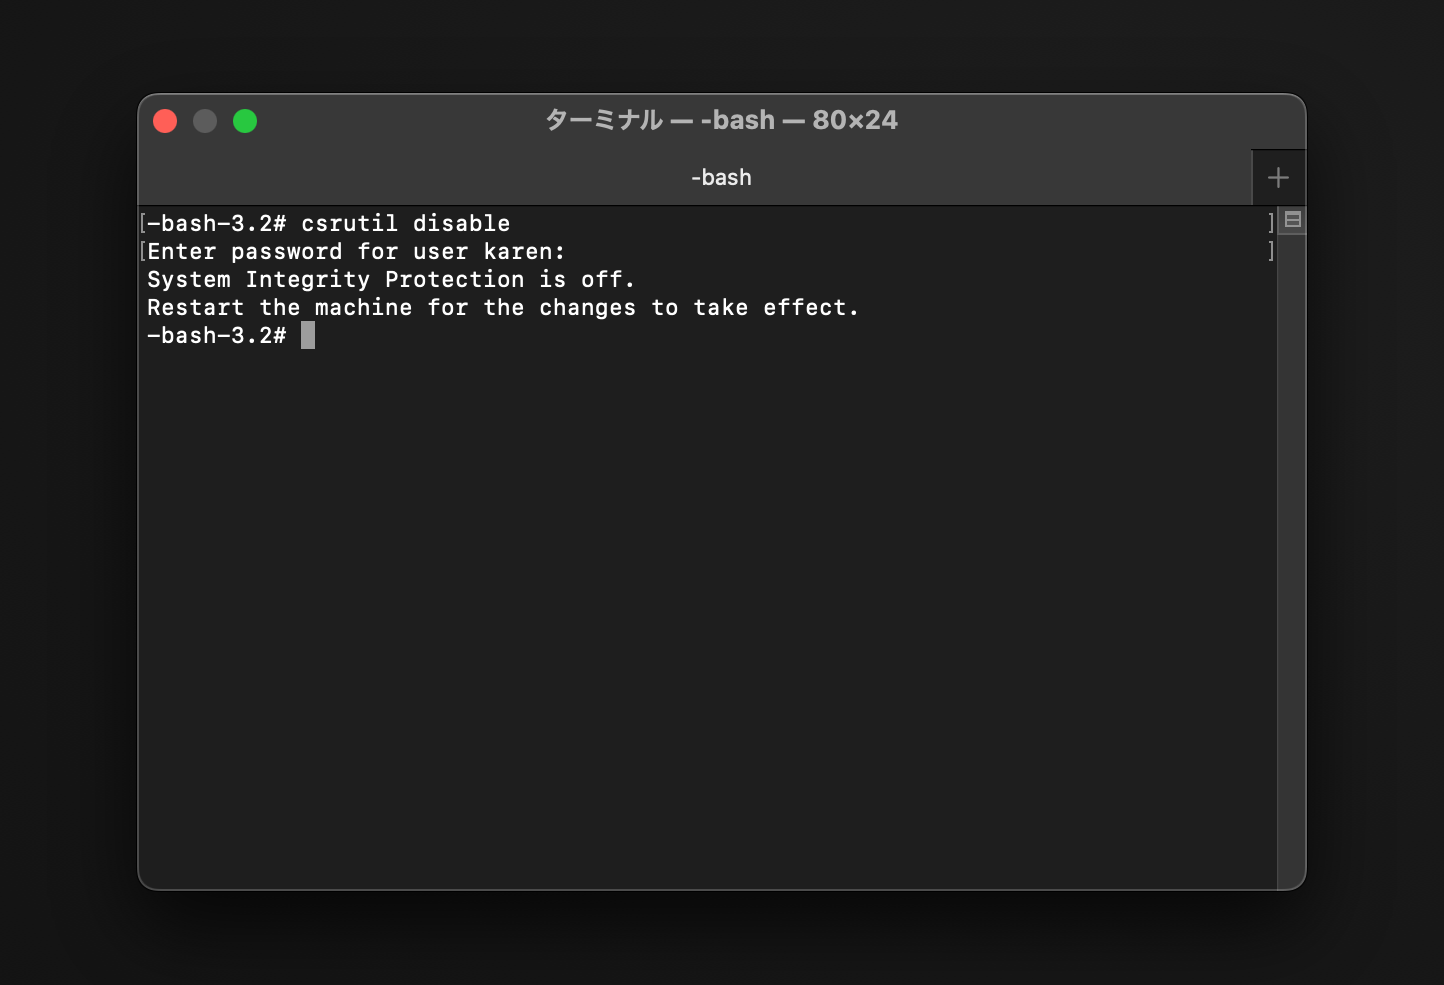
In the window that opens, type csrutil disable and press return. This turns off System Integrity Protection so
that TotalFinder can be installed.
Reboot your machine and you may install and run the latest version of TotalFinder.
Once TotalFinder is installed and you have run it for the first time (so it has a chance to install its system component), then you may turn SIP back on.
To do this, reboot and hold Command+R until the Apple logo appears once more. Go to Utilities->Terminal and type
csrutil enable and press return. Reboot, and you are done.
Technical details
TotalFinder works by altering the built-in system application Finder.app.
In order to change some features of Finder, we use a technique called code injection. This means we add some additional code
to the Finder program whilst it is running to do what we need. This is relatively safe - in fact we do not change any part of
macOS on the disk. You only have to quit Finder via Command+Option+Esc, and the Finder will restart and everything will be
as if TotalFinder was never running.
However, in El Capitan and later the macOS developers added a feature that disallows this kind of modification even if you have administrator access. It will also disallow other kinds of modifications (such as replacing parts of the system on disk).
In order for TotalFinder to be able to do code injection into Finder.app we need a help from the system. We need to install
a special system component which allows circumventing SIP restrictions just in this special case. To install this system
component the SIP must be temporarily disabled. When you disable SIP and run TotalFinder, it prompts you to install its
system component in the location /System/Library/ScriptingAdditions/TotalFinderSIP.osax. When you turn SIP back on it will
allow TotalFinder to inject into Finder.app.
This should be one-time setup. This component usually does not change between TotalFinder versions. So it should not ask you to repeat these steps with each TotalFinder update. When we need to update this component for some reason, TotalFinder will prompt you and guide through the upgrade process. You can visit this page to see the list of historical versions of the component with reasons to replace it.
Uninstallation and SIP
To remove TotalFinder from your system, run the uninstaller found on the latest dmg download of TotalFinder.
Note that if you have SIP turned on, then the uninstaller will not be able to remove the
/System/Library/ScriptingAdditions/TotalFinderSIP.osax. This is not harmful (it won’t ever be loaded if you do not run
TotalFinder), but to be totally clean you should disable SIP and either manually remove it, or run the uninstaller again.
Further information
You can find some further information in our blog post.
